Wednesday, May 20, 2020

Book of Kells Project: Back up Blue

I did it on a whim and I didn't regret it:  a lake of deep blue columbine.


It wasn't something planned.  I stumbled across a great mass of flowers in a public area near a local park and thought, "why not?"

I actually grow this flower.  It's a rich royal blue, almost purple, columbine.  My plant, and it's daughter plants, was a volunteer at another local park that kept getting mowed down until I rescued it in the dead of night.  It's not a native plant so I was helping, right?

 Anyway, after getting lake pigment extracting down to a competent level, I was on the look out for newer materials.  I started looking at flowers thinking, "What color could you produce?"  


Now my columbines don't produce masses of flowers.  Just enough to be a splash of color in the shade garden.  But there were so many of this stand, I could easily pluck a handful for a test lake batch without striping them.  As a general rule, unless it'd a dead common plant, like dandelion, never take more than you need, and always leave some to carry on.

Now most of the plants I experimented with, when laked, produce a color that shifts a little or significantly from the original.  Blue iris goes green. Red Rhododendron goes purple.  Even madder shifts to a different red.  A mullein lake came out sunny yellow, but yellow dye plants are generally strait forward that way.  Blue dye plants have no such reputation.  Woad and indigo are dark green and both require extensive processing to extract the blue bits.


Not so with this columbine.  When dried, it made a nice medium blue.  


This isn't to say one could dye with it.  Only it made a beautiful blue pigment that probably is not lightfast.  But if I need a natural bluey blue I know I have it.  I even made a second lake which produced a pale blue, perfect for sky.   


Saturday, April 25, 2020

Book of Kells Project: Glas Verdigris nó Glas Iris? Sin an cheist.

 In the Book of Kells, verdigris was used for green.  It's brilliant, not as toxic as some(looking at you, Orpiment!) but it had the drawback of being rather caustic, much like oak gall could be.  Like gall ink, it's not hard to make, but I didn't like the thought of all this effort, only to have it eat through the paper and destroy my art.  

So I looked to see if there was a period alternative.  And there was: Iris Green.  

Iris green ink was made from the blue iris common in Europe, but any blue or purple iris will do.  The flowers are collected, and either boiled or(nowadays) frozen, then mashed, squeezed and strained.

Then alum is added. Initially this will change the dark purple liquid to a dark teal.  Historically, cloths were dipped in this liquid and dried, then wetted with a bit of water, much like with cheap water paints.  Sometimes this was done in a shell dish and this was credited with bringing the green out.  Certainly, a lake of the alum mixture will produce a deep vivid forest green.  But it is very useful to have a pigment that doesn't require grinding and mixing with a binder.    


There are a couple of problems with Iris Green.  Firstly, it's not as colorfast as verdigis.  Secondly, the ink will not keep.  There's a third problem in that you are completely at the mercy of the Iris growing season May to June, though I was lucky to get some in late April.  And they don't all bloom at once.  And when they do bloom, you might find, the blue and purple ones are taking their time.  White irises are very pretty, but useless for these purposes.  So you must pick them when you can then freeze them until there's enough to work with.


I put my batch of irises in a small pot with just enough water to barely cover them.  The colors are surprisingly heat resistant, but I don't like to reduce more than I have to.  Then boil, simmer, until the flowers are pale and washed out.  mash them to get every last bit of pigment out, strain, squeeze and transfer the deep purple liquid to a glass container.   


Now the alum, diluted in a little water, is added.  The color change is instant.


At this point some people report being able to use the ink immediately.  Personally I find the green too weak with concentrating it by inspissation (technical word for letting it sit and evaporate).    Also prefer to add a drop of soda ash to shift the color.    

I was finally able to make quite a bit, but, without even a design finished or a draft, I had to put the jar in the freezer to keep. 

Iris lake made out of another batch:


Of course, the lake has the advantage of being stored safely in dry form.


Wednesday, April 15, 2020

Book of Kells Project: Inks that might have been

 While waiting for nature to produce enough Iris to make green ink out of, I turned my eye to other blue flowering bulbs in abundance, in this case Grape Hyacinth and Bluebells.  I thought it was possible they might have similar substances that could also make green ink. 


Grape Hyacinth, with all that rich dark purple pigment, looks like it should do something.   


And it sort of does...it produces a middling purple wash that isn't very exciting.   


Adding alum doesn't seem to shift the color much, so I decided to save it in case the orchil lichen didn't work out. 


Now Bluebells...they were a magical surprise.   The Bluebell has a history and association with the fairies.  Some worried children who played among bluebells could be stolen away....a concern that might have it's basis in the more pragmatic fact that bluebells, like many flower bulbs, are poisonous. I did feel, as I was picking flowers, I needed to respect tradition and leave some offerings.  Whether you think the fairies are real or not, it's always wise to act as if they are.


Processing bluebell flowers were more successful.  After straining they produced a beautiful blue liquid I call "Fairy Blue".   


This liquid did  color shift after alum and made a weak green ink.  But here was the magical part:  in warm light(usually indoors) it was purple; in cold or bright light(full sun) it was green.


Alas, I can't find the test sample images.  I'll add them if they come up. But I felt glad to not only have a possible substitute if Iris Green didn't work out and the fascination with a natural two tone ink.  

 [place holder for samples if found]

Neither Grape Hyacinth nor Bluebells has been used as ink historically as far as I know.   


Monday, March 30, 2020

Book of Kells Project: Red That Might Have Been

In the Book of Kells, the pigment confirmed to be used as red is red lead. 

Red LEAD.  We're not going that.

But let's explore this pigment choice. Why didn't they just use madder? 

Madder was known and grew throughout Europe.  The laking process was technology easily available to monks.   And madder is the truest natural red.  And, perhaps as important, I grow it and really wanted to use it in something cool and interesting.  

Now the Renaissance painting masters used Madder Lake, but this is not rocket science (Philosopher's Stone Level Alchemy?) even for the Middle Ages.  True, of the lake colors, madder can be the fiddliest to get right, but this just takes time and honesty, what monk doesn't have loads of time?   

I really didn't want to use Amazon to hunt down a safe(maybe?) form of red lead when I had madder growing in the front yard.  What would a monk do?  Surely they would use what they had at hand before seeking exotic and dangerous imports(to be fair, they probably had no idea how dangerous lead was).  And with that excuse, a maddering I went!


Madder, or Rubia tinctoria, is the go to dye plant for true natural reds.  Altering pH can alter shades, but, except maybe for purple/violet, why would you? There are many online resources to dye with madder, but few to get pigment.   We're all rather stumbling around in the dark ages of the future trying to recreate the past.

Except for the top of the line pigment produced by Kremmer.  But they don't count, showoffs.

Continuing to stumble around in the dark, the best resource I found was a violin forum, Maestronet .   Madder lake is apparently used in traditional varnishes.  Between this forum and several scientific and historical reconstruction papers, I was able to cobble together a tentative plan...

Step 1: plant madder seeds.  

Step 2: wait three years.

I'm not just being cheeky.   I planted my plants almost four years ago as part of the herb, medicine, dye and historical plants garden.  I have dyed with madder in small batches and it is so handy to have it right out there.   Ideally one digs up roots at the end of the season, though these I dug up early spring.  YOu can even root up small amount in the middle of the year for test projects.  And if you dye with a traditional stinky woad vat, madder helps the fermentation process. But for best results they should be allowed to grow mostly unmolested for at least three years.


After digging the roots up, I washed them thoroughly.  Many sources stressed this as essential to get a good clean bright red.   Of course by "wash thoroughly", I just let them sit in water for most of the day, then swished most of the dirt off.  After a through rinse in the sink, I cut the roots up into small pieces, then put them in a jar filled with water and a large slash of vinegar and let them sit a week.


By that time the roots should be waterlogged and settled.  One can heat them to try to extract more pigment, but one risks shifting the color to orange if the pot gets too hot.  Playing it safe I stuck with the cold extraction.


I strained the liquid, removing the roots, and added the soda ash.  This is different from other lakes in that alum is added first.  I'm not sure if it matters, but I'm taking chances with a once a year harvest.  I trust the lads( and lasses) at the violin forums know there business!        


From dye pots, I know adding the soda makes the color more vivid, but the water was so dark crimson, one couldn't tell.  Then I added the alum, and the color shifted, and, as lakes do started to congeal...very, very, slowly.  One has to be patient, but with experience one can see when it's happening very slowly, when it's not happening, and what careful corrections one should take.   


In this case, after the first panic of it either not working or turning pink(utter death for a varnish), I was pleased that not only had it worked perfectly, but I had some of the highest quality sought after crimson one could make. 


After settling, it must be strained by a very fine coffee filter.  Then scrapped off onto a glass or nonreactive metal surface to dry.


It dries almost black.  I assume in grinding the red comes out again.


Well, looking  at the abundant red left in the water, I saved to to make a second lake.  That was so smart because I was able to get a stunning fire engine red.  

This was very satisfying.  Another lovely thing about madder dyes and pigments is they are, if not colorfast, then extremely resistant to fading.  Of course nowadays  alizarin, the red chemical in madder, is synthesized, a much less magical process.   I'll stick to my madder patch while I have it.


Saturday, February 29, 2020

Making Lake Pigment

 I came across lakes while trying to find a way to make natural red pigment.   I'd already dyed with madder in the past, but simply powering the root doesn't work.  I wasn't even sure if madder would be the best choice.  Then I discovered Madder Lake.
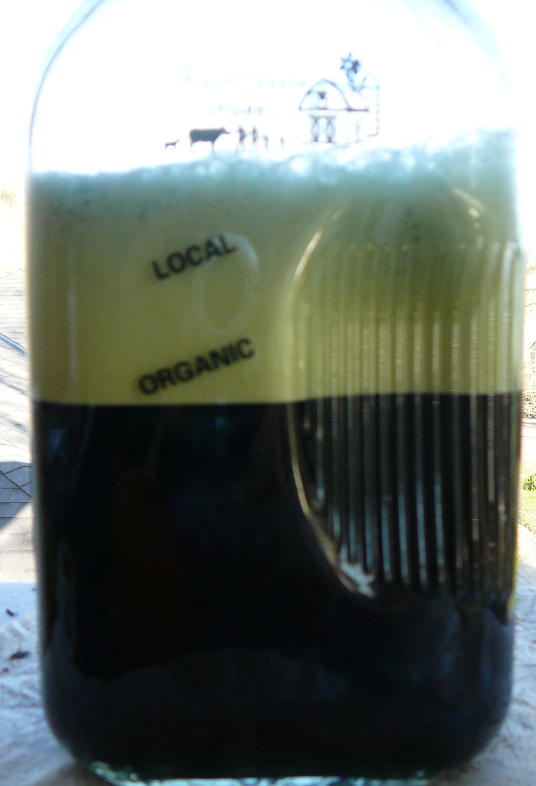
It has no coverage, that is, it can't be used by itself to just cover up a color, but it is red, it is natural and it does work. 

Laking can be done with almost any plant  that has enough strong coloration to make pigment.   In the simplest terms, a "lake" is using a chemical reaction with alum and some base, lye, chalk or soda ash, to bind the colorants in a stable form.  Most lakes are made by soaking or boiling the plant material until a dark pigment saturated liquid is made.


Then one dilutes alum with a small amount of water and adds it to the pigment.  Often, though not always,  there is a color shift, usually to a richer more saturated hue.  But sometimes the liquid is just too dark to tell.  To this alum mixture is then added a diluted base.  Sometimes, like with chalk, there is a vigorous reaction. But usually there is just an interesting, but not messy, swirling of the contents as the alum and base bind together.   

Proportions are important: too much of one or the other and the color is weak or pastel.  Or their is a lot of whitish debris that increases washing time.  Generally more alum is used than the base, but exact proportions vary on the kind of base.

Once the reaction is complete, the liquid will be filled with a colloidal solid.  This will take a while to settle, often hours, if not a couple fo days depending on the pigments involved.  After it settles, it's washed, that is the liquid is poured off consecutively until the water is clear and the settled solid can be strained and dried.   One can also save the first pour off to make another, paler, lake.   

This opens up a wealth of natural pigment possibilities.   But their are caveats.  Many plant based pigments are not colorfast.  There are exceptions: madder, weld, woad. Really anything that has a reputation as a colorfast dye will probably make a colorfast lake.  The color will be different: madder is pleasantly true red but woad becomes a dark teal.   The advantages of lakes, once they are dry, is they can be stored indefinitely, though one probably should keep them out of direct light.  When one was ready, they were ground and mixed with water and gum arabic to make a water color, or ground into oil for oil paint.


So this was exciting.  I could, in theory make pigment out of anything.  But I discovered this is February, when few plants are available.   Then I remembered the dye baths I'd saved.

There was a lot of mullein  and a medium jar of madder.  They were stored in a cold place in the garage and hadn't fallen prey to mold.  So I experimented.  It turned out to be the best thing, experiment with old dye baths.   Mistakes could be made that would have made me very sad with fresh, high quality madder roots.  Like when it when pink, for instance:


According to these forums pink madder is the worst.  I'm not a fan of pink, so I tend to agree.  The whole point of madder is making red.  But pink is a useful pigment  to have on hand, so lemons, lemonade, etc.

My drive was an inspiration for a Book of Kells project where I'd use just natural pigments.  Learning to lake pigments made that idea possible.


Sunday, February 23, 2020

Book of Kells Project: Woad pigment

 Woad pigment was used in the Book of Kells.  I wasn't too surprised.  Woad was used for blue dye since, well, prehistory probably.  It is said Celts tattooed themselves blue or painted themselves blue with woad.  But this is now being called into question for many reasons.  However, anyone who has used a woad vat would notice a blue scum does collect at the top and it seems perfectly plausible this could be used as a simple pigment.

Extracting indigo pigment from woad turns out to be much simpler than dying with a woad vat.  With a healthy plants, good soil and the right equipment, you can process and wash indigo pigment in a handful of hours. 

First the fresh first year leaves(*) are picked and thrown into boiling water. As soon as they are all in, I turned the heat off.  There is a fine balance between hot enough to extract but too hot and damaging indigo precursors.  I took it off the heat, put a tight lid on, and moved the pot to cool on bricks outside of the house.  


Once it's cool enough to handle(a couple hours or more), I squeezed the faded spent leaves, and strained the liquid.  It should be a lovely warm russet reddish brown.  This is full of indigo precursors.  Now some people use beaters or pour the liquid back and forth between containers, or a blender.  Personally, I have things to do so I go strait for the Vitamix. 

Pour the whole thing in, add a teaspoon or more of soda ash, and mix.

Use the lowest speed for a couple of seconds, until everything is mixing around, then take it up a quarter until you have a nice vroom and everything is getting frothy.  Don't go too high or too long, or the indigo will all land on the top of the foam and take forever to settle.  When you see spots of blue on the top of the foam...no more that 15 to 20 seconds...you're done.


You will be able to see the indigo falling to the bottom, in the dark greenish blue liquid as "swirlings", but it'll be too dark to see the pure blue until it's washed.

Let it sit for half and hour to and hour, however long it takes for the liquid to settle and most of the foam to disappear.  

Now you have to be careful.  The liquid is too dark to clearly see the indigo sitting at the bottom, though you may see some if you shine and very bright torch right up against the glass.   Because you can't see it, you have to CAREFULLY and SLOWLY pour half the liquid out(you can save this to lake  if you want to).   If you fumble, you have to put it down and let it settle again.  The indigo is so fine, once disturbed it is float freely, happy to escape down the drain!   Once you get practiced you have a good idea how far you can go.


Now add clean cold water to the jar filling it up, and let it settle again.  At this point you can barely see the slightly darker mass at the very bottom.  Usually no more than a quarter inch unless you have very healthy plants.  Repeat the process.


Now the liquid is a medium transparent green and the indigo is clearly visible.  Depending on technical skill and fine motor control, you can cut down your washing time significantly once you have an idea of how fast you can pour without losing indigo or cause backwash.  Once the water in the large container is a very pale green tint, you can transfer the indigo to a smaller container to wash.


You want to wash it until the water is clear and the indigo is a deep dark blue.  It will be the bluest natural blue you have ever seen, like a deep lake under a clear sky.   

Once the water is clear, then it needs to be poured and siphoned off.  Turkey basters and pipettes help.  When the indigo is in a small container with only an eighth inch of water, then it can be poured onto a glass plate or other non reactive flat surface to dry.  


Indigo is supposed to produce, once ground with binders and water a dark navy blue, not as spectacular as the deep blue dye. But at least it's blue.


*Most sources insist one use first year leaves.  But my plants are deciding they are perennials...after flowering, they put out new leaves from the roots and they are the same quality as "first year leaves". They should be soft, slightly hairy, green with the purplish stalk.   I don't know why my plants are deciding to be immortals, but I'm not arguing as long as they keep the blue coming. 

Saturday, January 18, 2020

My Book of Kells Project


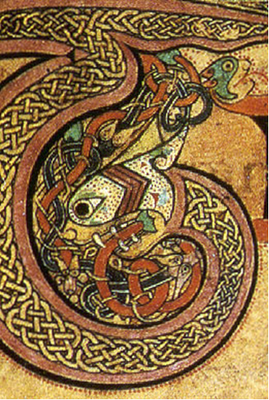
Detail Folio124 Book of Kells
About this time I decided to get serious about a Book of Kell's project I wanted to do the previous fall.


Last year I did the Book of Kells Course through Futurelearn.  At the time I hadn’t paid for Unlimited and, while I finished the course, I lost access. Now, because of my Irish studies, I have unlimited and registered again to regain access.

The Book of Kells is a well known national Irish art treasure. Less well known are the materials and methods of that went into it’s construction. It pages are vellum (calves' skin) and use inks and pigments from a variety of natural sources—plants and minerals—to create the stunning illuminations that have survived for centuries. 
 
At the end of the course, there was an invitation to submit material to a yearly competition.  But as this invitation was given a couple days before the deadline, that was never going to be a possibility.

 
I have had an interest in historical uses of herbs and plants for art and medicine for years. After the course, I wanted to make art using these same methods, or as close as a modern person can. My ideal goal was to only use materials used by monks of the time.  But the issue of obtaining vellum and a couple of seriously toxic pigments made that undesirable.

So I settled on using only natural based pigments, and a secondary effort to use as many of the original pigments as possible.  Starting this early, there should be no problem making the deadline.


Tá súil agam go bheith mé críochnaithe faoin am sin.

Ar aghaidh linn!


Links:


Part 1  Indigo Pigment

Part 2  Madder Lake

Part 3 Inks Imagined

Part 4 Iris Green

Part 5 Backup Blue

Part 6  White

Part 7 Gall/Acorn Ink

Part 8 False Orpiment

Part 9 Lichen Dyes and Inks

Part 10  Design and Tracing

Part 11 Inking

Part 12 Grinding and Mixing Pigments

Part 13  Green, Red, Blue

Part 14 Chestnut Ink

Part 15 Finishing Touches

Part 16  Reflections