The Great Woad Experiment: from 2006-2016
I’ve been growing woad for years. My first wee plant I started from seed, outside and I still marvel it came up with so little fuss. One day a couple weeks later, there it was , a small rosette of leaves.
These plants are decedents of many years, for while I have grown and harvested woad, I had yet to succeed in making dye.
[plant pic]
I am a bit of a romantic purist. Many other worthy woad-ers have developed new methods. One includes beating air into the water…?
That’s lovely and good luck to you if that’s what you’re looking for. Here, we will be exploring the fermented vat dying used in the middle ages. The Ye Olde Stinky Method.
My attraction is connecting to the past crafters by doing my best to understand the craft by doing it the way it was done, or at least as close as I can with the materials on hand. And so I am committed to the fermented brew method.
Warning: this stinks. Quite a bit. The process breaks down the plant fibers mechanically, and chemically, releasing the indigo on the molecular level. It took reading and rereading old texts and several scientific studies to make a roadmap of the best way forward:
Step 1: Harvest first year leaves and mash into pulp.
Traditionally this was done with a woad mill, a horse drawn wooden wheel that would crush leaves. Workers would then gather them, perhaps knead and crush them more by hand. One should be cautious of taking the short cut of using a food processor to blend the leaves or chopping them with a knife. There is a theory that some of the bacteria necessary to start the fermenting process is on the surface of the leaves and NEEDS to be crushed and smooshed into the wet leaf mix.
Note, first year leaves have the most indigo, but I have found second year leave to have some. Not a lot, but enough I find it worth throwing in the vat if I’ve nothing else. The dye will be weaker.
Step 2: Make balls out of the mashed pulp
Ideally you have enough to make balls the size of a fist, but, until recently I rarely had enough to make balls more than a couple inches across. Put these on wooden racks or shelves covered with news paper, in a shaded warm, but ideally not hot, place, with plenty of air circulation to dry. I use a garage or shed. Try not to dry too fast; you want ball to start to rot/ferment inside. It will shrink slightly during this process. When its completely dry, it’ll be a hard dark ball.
At this point you can store it indefinitely. I spent a couple years after the first failed woad vat doing this, making balls and storing them.
Step 3: Crush the balls with a hammer and soak them in ammonia for a couple weeks
Traditionally this is call “couching”. Also, traditionally, one uses, ahem, “home made” ammonia, that is urine from privies set aside to ripen for a week expressly for purposes like this. In the Middle Ages urine was necessary for all sorts of chemical uses. I’ll leave it to the individual to pick their ammonia source. The leaves should be thoroughly soaked, no standing liquid; I put mine in a plastic container and seal it with a lid. If you leave it longer that 2 weeks, that’s fine. I once left mine for 2 months and it was okay. 2 weeks seems to be a minimum.
Step 4: Mix the couched woad with hot tap water and soda ash
This is where things get tricky. I make very small batches so I think in terms of handfuls and pinches. Other people are doing things in tubs, so they think in pints and gallons. The good news is this is not an exact science and there is a bit of an art. And to some degree you can correct. Keep notes. I’ll describe what I did, give rough gestimates on measurements and let the reader take from that what they will:
My first successful woad batch had perhaps 2/3 to half cup of dry crushed woad couched in a cup or so of “traditional” ammonia. To that I added 1 tablespoon of soda ash and enough hot water to make it a pint. This mixture was stirred thoroughly, then poured into a gallon bucket , where I added a little more water , perhaps up to a half gallon, then closed it with a lid, and set it in a warm room for a couple of weeks.
It is also possible to brew it on a stove for a quicker batch but
a: it stinks
b. you run the risk of cooking the bacteria that is working in the vat
c: it stinks
It does, however, need to be warm. Traditionally woad dying was done in July and August, in the heat of the summer. I can cheat a bit because, as a ceramic artist, I can always put the vat in the kiln room any time of year. Heat is definitely necessary for the finally success. But for now just let the wee bacteria ferment and brew at their own pace.
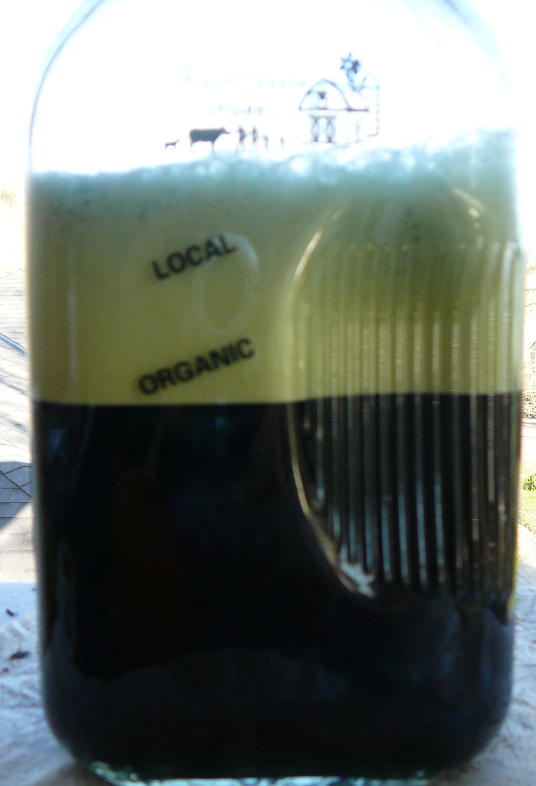
Step 5: Test the vat PH
In a couple weeks you will notice an iridescent, bluish scum form on the top of the water. It’ll start out as a colorless oily sheen, but then slowly take on a bluish hue, if you have enough indigo. The vast, if not ready, is definitely getting there. Indigo ions are floating free and the water will either be yellow or green. Using ph strips dip one in. You want a ph of at least 10. Off the chart is fine. My batches are 11+. If it is lower than that, add a little soda ash, a tablespoon at a time. Mix, test again. Once you’re ph is set, you can go to the next step immediately or wait a couple days until it convenient for you.
Step 6: Dying preparation
I advise experimenting with animal fibers. They’re the most vibrant. But any natural fiber will work. Woad doesn’t need a mordant, but it does need for you fabric/fiber to be thoroughly soaked. Try not to overwhelm your vat like I did and limit fiber amount to give or take 4 oz per gallon.
Soak your fiber/yarn/cloth in a bowl of warm water for at least an hour to overnight.
Step 7: Dying
Heat the vat up to no more than blood heat(90 to 98 degrees). By touch this means when you put your finger in the water you can barely feel it because it’s the same temperature. I actually like mine slightly warmer, but no more. You can heat on the stove (carefully), or put the vast in a hot room(kiln room? Furnace room?), by a fire if that’s convenient. Use a wooden, plastic or stainless steel spoon or implement to GENTLY stir the vat. You want it to be thoroughly mixed but to add as little oxygen to the water as possible. I do one last ph test at this point. If it’s go, then gently squeeze—don’t wring!-- most of the water out of the fiber to be dyed, then GENTLY slide it into the vat until it is completely covered. Using a spoon or your fingers, push the fabric down and manipulate is as you need to to make sure its evenly sitting in the vat, without clumps or folds. Then cover the vat with te lid and leave it for at least 15 minutes, but I recommend a half hour.

NOTE: I often have a test dye of a short piece of yarn, maybe 6 in, if I’m doing something large. Just soak it in water from the tap, dip it in for 10 to 15 minutes, then take it out. Then you KNOW all is working well.
Step 8: Remove the fiber and air
You might want to take the vat outside, into a garage, or on a back porch for this. It is likely to get messy and stinky. When the fiber comes out, it will be covered to some degree with woad compost that will have to be scraped or rinsed off. You also want to have someplace to hang your stinky, drippy experiment. Ready?

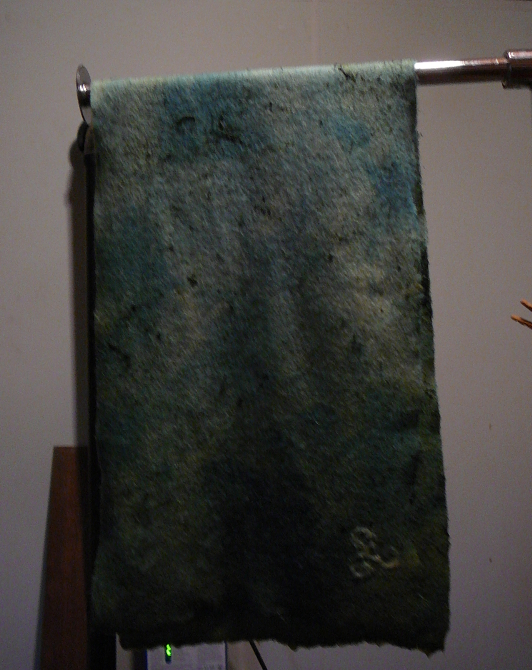
Open the lid and fish the fiber out, gently squeezing out the water, preferably back into the vat. Yes, this can be rescued, up to a point, and even without indigo, the vat has the cultures to make future vats. Depending on how large your vat was and the quality of woad, the fiber might be anywhere from yellow to green, with a scattering of woad compost. As it hangs exposed to air, it will very slowly start to change color, from yellow green, to blue green to blue. Unless you have a mad ratio of woad to fiber, the blue is likely to be med- light to pale-blue. It is possible to get a nearly navy blue on the first dip, but I’ve only seen that in a docu with a massive old vat and a tiny bit of sheep fleece. Usually fiber has to be dipped 2 or 3 times for that nice royal blue.
(Note: I failed to properly soak this fiber long enough, making a blotched dye pattern. Wish I could say "I meant to do that"...)
Let your fiber air until it’s completely changed, then rinse in out with cool water.
The Magic: what the heck is going on?
As I understand it: The fermented woad vat involved several chemical and biological processes that result in a low ph environment that forces indigo molecules to float free and lose their blueyness. In this state they permeate fabric. But when they’re exposed again to air, the molecule rebinds with oxygen, trapping it mechanically in the fibers and returning to it’s blue color. The blue of woad is permanent. Only bleaching will destroy it.
This was my very very first success. I remember jumping around yelling, “Eureka!”
I had failed yet again, decided to add a little more soda ash, test it with the yarn, and nothing. Still. Sigh. Then out of the corner of my eye I thought the yarn looked a bit odd. It was undyed wool, and covered with a scum of green woad compost, but it seemed darker…. A closer look showed it had in fact turned blue! Well, teal, because the undyed yarn was an oatmeal beige.
It was quite exciting stuff.
Thank you for reading, especially the people who dye with indigo plants who must have found this to be the funniest thing ever.
GMRA